Speaker Build Report
I wanted to share my build report on my new home theater speakers. I built three matching speakers - left, center, right - to go behind my acoustically perforated projection screen. Because they stay behind the screen, this is perhaps the last time they will ever be seen. But I wanted to get better at wood-working skills, so I tried to build these as if they were to be visible (but at several steps I could have taken shortcuts which I will describe).
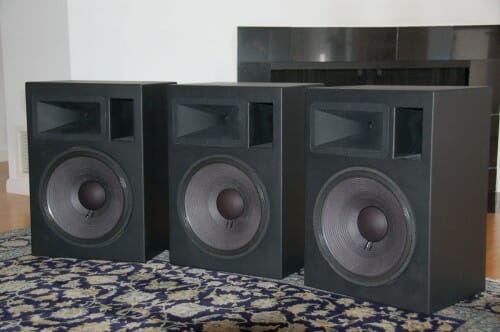
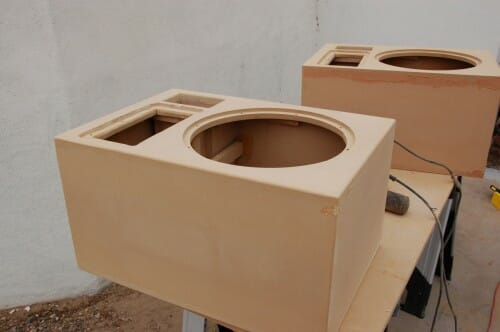
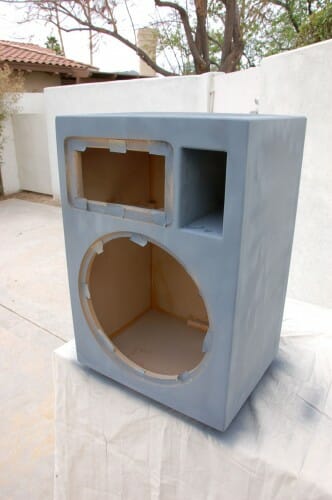
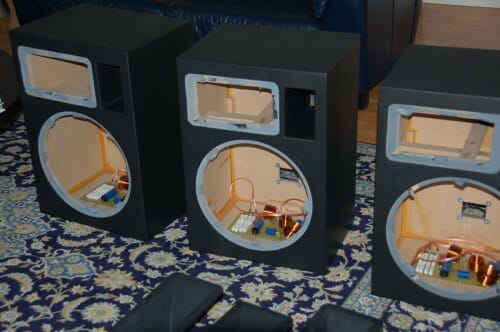
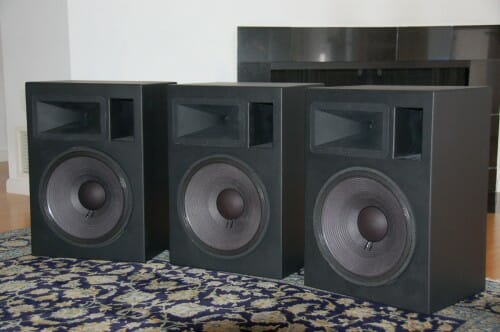
Here are the finished product:
I will put the rest below the fold so as not to bore those not interested. My apologizes to feed readers, but I think you will see the whole thing.
Though I know a bit about the theory of speaker design, and have some basic software and algorithms, I really did not want to design the speakers myself this time out. So I set out to find a good design. This is obviously hard, because it is really difficult to audition custom speaker designs. In the end, one has to trust reviews and the reputation of the designer. I also considered one other factor -- I knew that I was a real novice at this kind of project and wanted to have some good support.
In terms of characteristics I was looking for, I was looking for a big sound that could fill a large, acoustically-questionable room. Early on in my search, I became fascinated with the idea of using horn-type speakers similar to a lot of professional audio stuff, particularly since this is what actual movie theaters use behind the screens (though in MUCH bigger rooms). I liked this as an approach, because it would let me build something that is not readily available in most consumer audio stores (after all, why go to all this work to build something you can buy for $400 at BestBuy?). I wanted something dedicated to movies so I could move my B&W 805's, which are there now, out from behind the screen to be dedicated to music duties (the screen inevitably imposes some audio compromises and so for music, I want to get it out of the loop).
In the end I settled on the 4PI speaker designed by a guy named Wayne Parham in Tulsa. This kind of design with the horn-style tweeter is Wayne's stock-in-trade. He has a good reputation and is unbelievably helpful, even to a rank novice like myself. His web site has forums with a lot of questions and answers, including this build report on which I relied heavily. If you leave a question on his web forum he will reply within hours. (Update: Someone asked about the crossover design in the last post. Wayne has quite a bit of material on crossover design, particularly here - pdf).
To get the plans for a speaker, you just leave a request in his forum and he emails them. At that point you are free to go build them on your own. However, Wayne sells parts kits (as well as assembled speakers) and I chose to buy his kits. In his kits, he also solders together the crossovers (the electronics that split the frequencies between the woofer and tweeter) which was fine by me because I do NOT need further practice soldering circuit boards. He has several driver options and I chose to pay up for the more expensive options.
I decided early on I would build the speakers out of MDF (it is great speaker making material because it is about the right density and absolutely acoustically dead). The other good option is Baltic birch plywood. MDF, however, is very easy to work with and takes paint well, and I know I would be painting the final product (so no reason to hassle with fine hardwoods). I used 3/4-inch material for all of the speaker except for the front baffle, for which I used 1-inch (I needed extra depth to inset or flush-mount the drivers, more later).
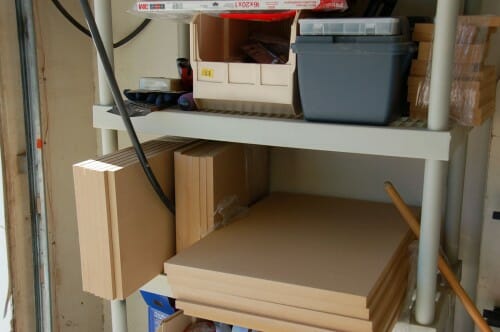
The problem was that I had no table saw and really did not have the space for one. So I drew up a cut plan for 2 sheets of MDF and took it to my local woodworking store which was happy to make the cuts (very precisely, I might add, probably better than I would have) for less than $50. So here is the material -- A lot easier to get home than two 4x8 sheets!
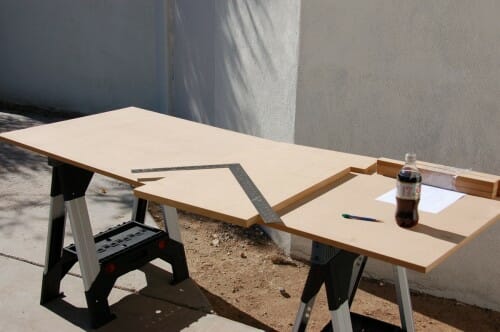
Don't be afraid if you don't have a workshop - neither do I. All I have are two sawhorses and a sheet of 1-inch MDF I set out in the driveway
OK, the first step is to start laying out the front baffle from Wayne's plans. I thought the rectangular openings would be easy, and the big circle for the woofer would be hard. It turned out exactly the opposite.
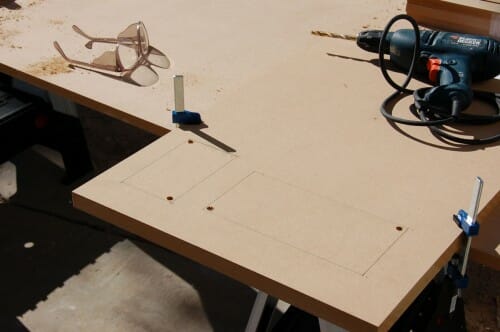
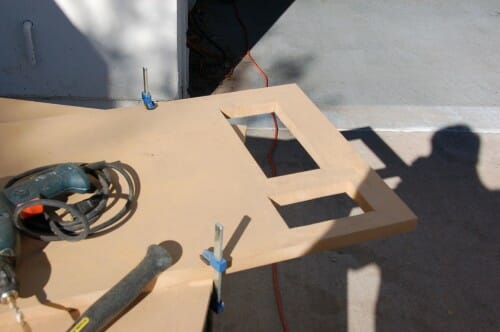
As you can see, I drilled holes, and then used a jigsaw to cut them out. My cuts sucked. As it turned out, as long as you cut the small rectangle (that is the port) on the small side, you will be fine no matter how bad the cut looks. And in fact the large cut is not visible either, because it is behind the flange of the horn.
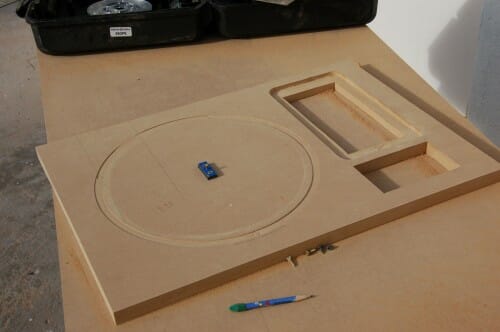
But -- big but here -- I decided to inset the horn so its flange fit relatively flush with the baffle surface. I wanted to make the flange inset with a rabbet bit. But this follows the contours of the original cut, so if the original cut was shaky, so will be the inset. As it turned out, this was the weakest part of the build. Eventually with a lot of hand filing I cleaned it up, but it was never great. Next time, I would need to build some kind of jig to make the lines cleaner.
By the way, this is one of those spots I could have saved a lot of time. Sound-wise, it would have been fine to just bolt the horn (and woofer) flanges to the baffle surface -- after all, no one will see it anyway. I just wanted to try to make it nicer for practice. After all, next time I may be building speakers for looks. But, on the other hand, it is the very rare speaker that has rectangular ports and drivers. From the next step, I now know that round is MUCH easier, which is good since most all speaker drivers are round.
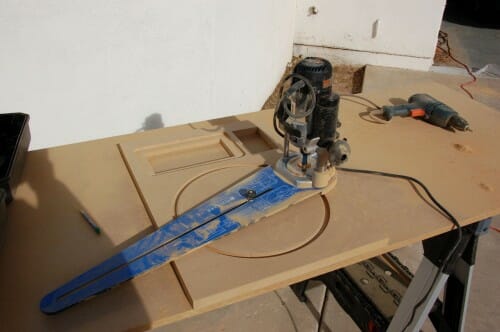
In the step below, I start setting up for the round cuts. I am using a router tool that makes circles. First, the center pin is screwed into the center point of the circle (don't worry about the screw holes, the part it is screwed into will soon be scrap).
The first step is to cut the inset for the flange. This has to be done first -- after the next step, there will be no MDF in the center to which we can attach the circle tool
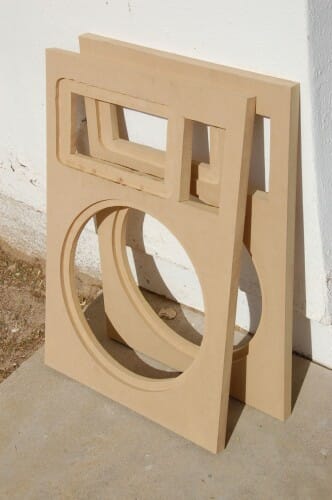
I cut the circles in multiple passes with a 1/2-inch bit, using the router plunge base. After cutting the circles, this is how our baffles look. Again the circles turned out perfect, and in the finishing stages required about 0.01% of the work the other two openings required to make look nice.
To get more bass, most modern speakers use a ducted design. The cabinet is well sealed (like a pressure vessel) except for a single duct of specific area and length. The duct causes the cabinet to act as a Helmholtz resonator, which is as far as I will venture in to the science of these things. Anyway, the ducts need to be built. In most speakers these are round and just use a length of PVC pipe. In this design, the duct is rectangular and is assembled from MDF. I used a plate joiner with biscuits to make the joints stronger. If you don't know anything about joining (I didn't) then you can find videos on YouTube of varying quality or if you are really serious about learning you can join Smartflix. (your welcome Travis).
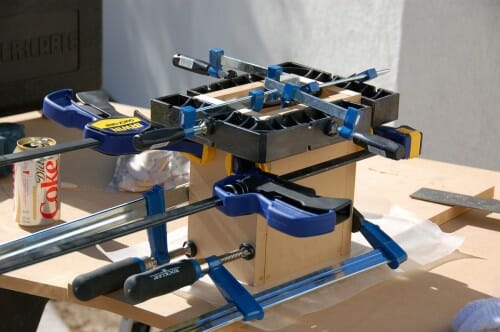
Here we are clamping up the duct box. I found two right-angle jigs, each on opposite corners, was enough to keep the whole things square (or close enough, which I define as close enough that I can get it to tolerances with a orbital sander).
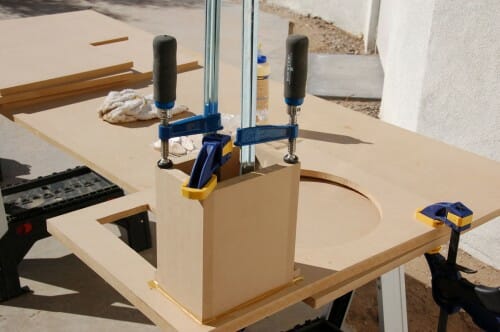
Then, the duct is glued to the baffle, aligned with the smaller rectangular port we cut. Before gluing it on, I sanded the duct box.
I failed to get a picture of a critical step. A while back, I said to cut the port a bit small. The reason is that once the duct is glued to this port, you can use a router with a piloted flush cutting bit to clean up the holes so the port and the duct will be the same size. The duct itself essentially provides a jig for cutting the port to size.
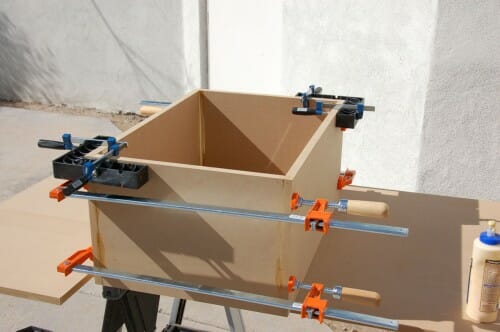
Now its time to start assembling the cabinet. I am using the same basic approach as with the ducts, using squares on opposite corners and lots of clamps and Tightbond II wood glue. Biscuit joints are used. Don't worry about glue mess. The stuff on the outside sands right off (another advantage of painting, we don't have to worry about messing up a stained finish or the wood grain). On the inside, I put an extra fillet of glue. Remember, these boxes are pressure vessels and all joints should be air tight (I ended up caulking them all as well).
Before we glue the baffle to the cabinet, I drilled the bolt holes for the drivers and added nuts to the back of the holes. I used a mix of t-nuts and these things.
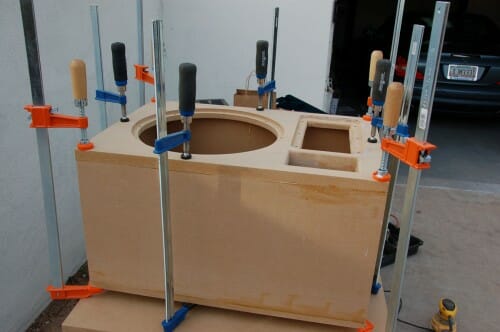
OK, now we join the front and back baffles to the cabinet Starting to look like a speaker!
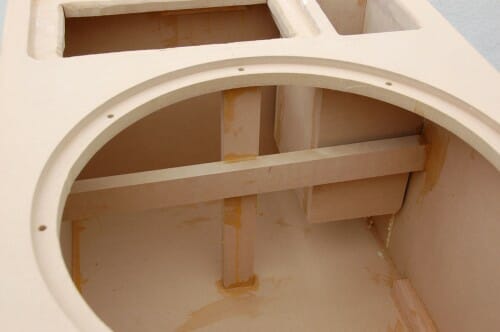
As per Wayne's design, a pair of braces are put in between the woofer and the horn. You can sort of see the duct/port here after I used the flush cutting bit. I have already at this point also used the router to cut a 1/4-round edge on the port, just for looks.
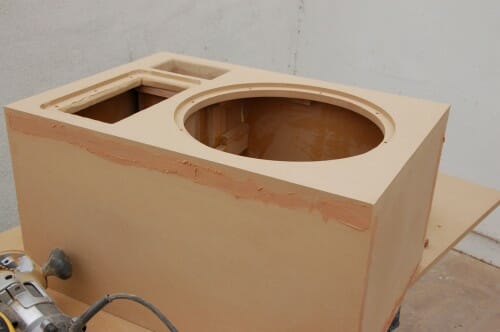
Again, we are not staining this thing or worried about wood grain, so I used Bondo auto body filler to fill cracks and gaps. Much orbital sanding (80 grit, then 220) now ensues
The quarter-round router bit is used to round off all the edges of the box. More sanding ensues.
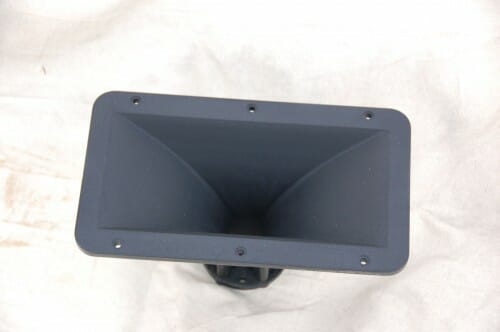
I need to do one other thing -- the horn itself is shiny and can be a problem as it can actually reflect projector light from behind the screen. I spray painted the horn with Krylon flat black. There is an exposed metal ring on the woofers, and I sprayed that black as well.
The speakers are now painted with Krylon primer in a spray can (took about 2 cans per speaker for all the coats). I used 2 coats, sanding between coats. The paint I used does not need primer, but the primer helped me find gaps and places I needed to finish more. In retrospect, I should have just sanded with 80-grit after the primer. I think I made it too smooth with 220 for the finish coat.
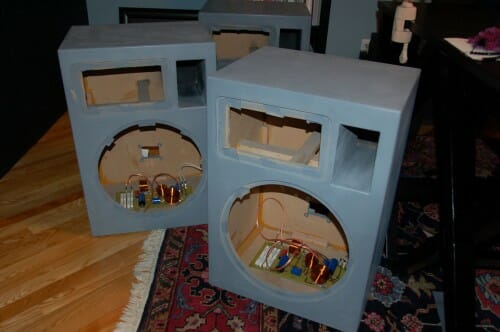
Once primed, I was still waiting on the special paint I ordered. So I inserted all the electronics. You can't really see it, but I used gaskets cut from shower pan liner between the components and the MDF to damp any possible vibrations.
I used a paint called Duratex, which is essentially a spray coating for pickup truck bed liners. I was immensely skeptical about this idea, but all the speaker builder boards seemed to swear by it. So I bought a gallon (more than enough) and tried it. I bought the spray version because I wanted minimum texture, and rolled it on using a 1" foam roller (the smoothest kind). If you have the equipment, spraying this stuff might look even better.
I was not happy with the first coat - it dried so freaking fast and was so thick that I got more texture than I wanted. I don't know if this is a problem you might have or just an issue with doing the work in Phoenix with a relative humidity of like 0.003%. I sanded down the first coat and then thinned the paint with water. The second and third coats look great with the thinning. Very professional, except for a couple of small spots. This stuff is like paint on formica.
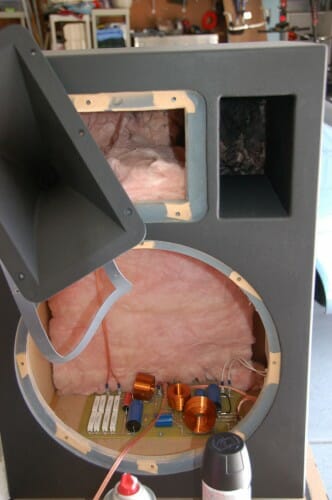
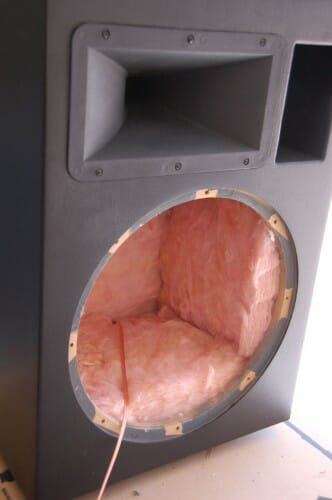
All downhill from here. I first added the speaker binding posts on the back (sorry, no picture). I then put insulation, per the instructions, on the back wall and over the bracing in the middle (the design called for r-11 or r-13; the only kind I could find at Home Depot had a paper backing but that was easily removed). The insulation cuts way down on mid ranges and higher frequencies in the cabinet but lets all the bass through (the cabinet is all about the bass). I spray painted some black on the insulation at the back of the port. I then installed the horn with a hand cut gasket (you can see it hanging in the gray) made from shower pan liner (again, this is a pressure vessel, all connections need to be gasket-ed or caulked).
Now again per instructions, we add insulation to the bottom and port-side wall. The last step is to add the woofer. The woofer came with a gasket but I cut my own, again from shower pan liner. Yes, I had intended to flush mount the horn but I forgot about gasket depth, lol, so it still sticks out a bit.
We are done!
I refuse to offer a full review of their sound until A) I can run them for many hours to break in the drivers and B) I can set up an A-B test (I am extremely skeptical of people's ability to compare audio components without direct A-B testing).
However, I will tell a brief story. In Crytonomicon, Neal Stephenson has a great description of large equipment like guns and band saws. He observes that most all equipment he has ever used sort of strains under the load. Only the unusual gear seems not to notice even the largest loads. That is how I would describe these speakers. I had AC/DC on at an absurd volume and they did not strain at all. In fact they are so efficient that I hardly had the amp up any where near its capacity. I think I am going to be very pleased with the results.
In fact, I really wish I had made a fourth. With some appropriate electronics, this would be the core of an awesome guitar amp.
Here is a probably incomplete list of the tools I used:
- jigsaw
- 5" orbital sander
- sanding black
- sanding sponges (for curved edges and inside of port)
- plate joiner
- portable drill
- pwer screwdriver
- router with plunge and regular base (rabbet bit, 1/4 round edge bit, piloted flush cutting bit, regular 1/2" bit.
- circle jig for router
- 28" clamps
- 8" clamps
- square edge jigs
- Rockler bench cookies
- various files and rasps
- plastic disposable putty knives for Bondo
- scissors to cut insulation
- Painting gear (including foam roller, roller pan)

Perhaps I missed it, but I don't think you mentioned what brand of drivers you used. Way back in the day (early '80's), I used to help build cabinets for live sound using all JBL components. Still love the sound of these old enclosures today.
> The problem was that I had no table saw and really did not have the space for one.
Pfehhh... A REAL man would have used a hand saw...
:^D
BTW, from my own experience, those blue quick-clamps you used in the resonator box picture, as opposed to the classic "screw-tightened" clamps, are just utterly gorgeous to use. I dunno if those are Dewalt (I know Dewalt makes and sells something looking exactly like them), but I VERY highly recommend you buy these to "replace" any of the old screw-style clamps. In reality, you'll keep and use them both but the screw types will receive rare usage when you exceed the 4-6-8 of the quick-clamps you've bought...
I know I've seen the Dewalts at Lowes, and something similar at Home Depot, and I'm sure you can find them in other places.
They make clamping things down, and unclamping them, SO much quicker and easier than the screw-type design that, after I bought 1 pair, I bought 2 more pairs. I'd buy a couple more (all different sizes) if I had the money right now. I really cannot speak highly enough for them when it comes to any kind of wood or metal work involving clamping things down.
One note: In this rare case, be particularly wary of cheap knockoffs. The Dewalts run ca. $8-12 a pair, and are damned well worth it. I've seen similar looking clamps on sale at Harbor Freight for as little as 99 cents each, they're garbage. You look at them dirty, and they'll break. Those Dewalts can handle all the pressure your hands can typically use in clamping anything down, and stand up to at least reasonable levels of lateral stresses and torques.
> (your welcome Travis).
;-)
Thanks!
Great write-up, by the way!
Nowhere near as elaborate, but I made a new chisel rack over the weekend:
http://tjic.com/archive/chisel_rack_1.jpg
http://tjic.com/archive/chisel_rack_2.jpg
and made 25# of pepperoni and 25# of sausage:
http://tjic.com/archive/sausage_50_lbs_in_basement_small.jpg
and recently threw from scratch and glazed a piggy bank:
http://tjic.com/archive/pigbank_1_small.jpg
http://tjic.com/archive/pigbank_2_small.jpg
http://tjic.com/archive/pigbank_3_small.jpg
http://tjic.com/archive/pigbank_4_small.jpg
> made 25# of pepperoni and 25# of sausage:
Err.
25# of pepperoni and 25# of ** SALAMI **.
> I was not happy with the first coat – it dried so freaking fast and was so thick that I got more texture than I wanted
That's what you get for living in the middle of a high speed drying oven ^H^H^H Arizona.
> I am extremely skeptical of people’s ability to compare audio components without direct A-B testing
Next you'll be telling me that you think that a $150,000 record played isn't worth the money!
http://www.clearaudio.de/download/laufwerke/statement/testbericht_statement_absolutesound.pdf
$150,000?
A $14,000 turntable should get the job done.
http://www.elpj.com/main.html
So how do they sound now?
Draft exclusion tape ( the Foam weatherstripping tape you can get at Wal-Mart ) will work very well for the gaskets, the shower pan liner is kind-of overkill. The foam tape will compress to allow your horn rebate to do as you originally intended. Wayne is a super individual, I've heard his Pi4's at Lone Star Audio Festival. They are superior speakers too. Good choice, and Nice Build.