New Floor for the Atrium
As promised (threatened?) here is a report on my home improvement project from this weekend.
We have a small (about 10x15) atrium area in the center of the house. We have never really been happy with this area, and wanted to develop it as a sitting area when the weather is nice out. We put in a ceiling fan and ordered some relatively inexpensive furniture, which of course won't get delivered for decades. However, we were dissatisfied with the floor. The original owners had a dirt floor, but the plants all apparently died. They then laid in brick paving stones in the atrium. Today, many of these paving stones are cracked and water stained, but I did not really have the energy or the money to dig them up and start over.
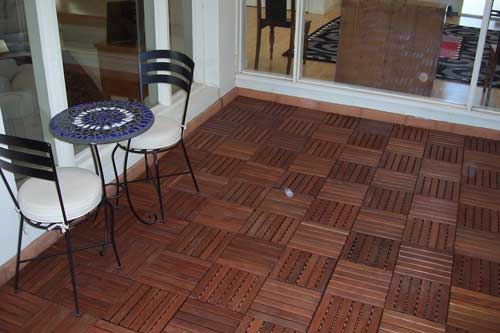
Last Friday we were at the Phoenix home show and saw a 12"x12" outdoor wooden interlocking floor tile advertised (they are called "interlocking keruing floor tiles"). The tiles have strips of finished wood that looks like teak (but are keruing, whatver that is) attached to a flexible rubber mat. See the pictures below for the top and bottom respectively (click on any picture to get a larger version):
They can be laid with all the strips running the same way, or, as we did it, alternating for a parquet look. The tiles were $3.25 each, not cheap but less expensive than alternatives, so we purchased enough to cover the area. They look pretty good, but not perfect - you can see the plastic milk-crate pattern through the wood strips if you look at the right angle.
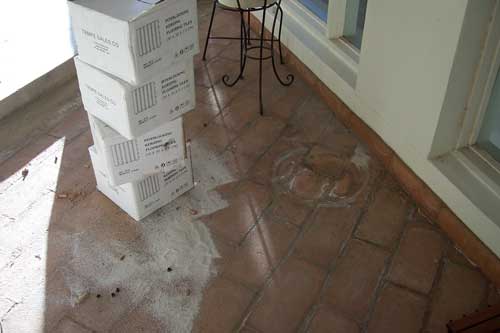
Here is the area before - note the water stains and the sand which is filling in big cracks and dips in the pavers:
Here is the floor after about 15 minutes -- they do go down fast. They just lay on the ground with no adhesive. The design of the bottoms keeps them from sliding around.
And finally, here we are mostly done. The company offers edge pieces that are designed like little ramps so a mat of these tiles can stand alone, but we did not need them since I was filling a depressed space wall-to-wall. Here is the final effect:
We love the result. I am just finishing a few diagonal cuts to finish off the last side - these were really the only hard part of the job. I made them with some careful measuring and a circular saw (got a new one with a laser guide - awesome!)
Anyway, this is not really the kind of thing I normally blog, but this product was something I had never seen before and came out so well and was so easy to put down, I had to share. Besides, if VodkaPundit can share this (which made me really jealous by the way), I thought I could show my weekend project too.


Great blog! I also live in the Phoenix area and am a small business owner but sadly didn't make the home show, which was only a few miles from my house. I was curious if that product is rated for exterior use (such as a patio) and if you thought it would be slippery for someone just out of a pool. Feel free to email me if you don't want to post your answer. (Take out the anti-SPAM REMOVE in email address, though.)
interesting product. Do you remember who was selling these or how to contact the company that makes/distributes them